How to Add Liquidity and Farm
How to use Swyrl Exchange to add your Token Assets to a liquidity position and start earning emissions
Breaking Down The Liquidity Page
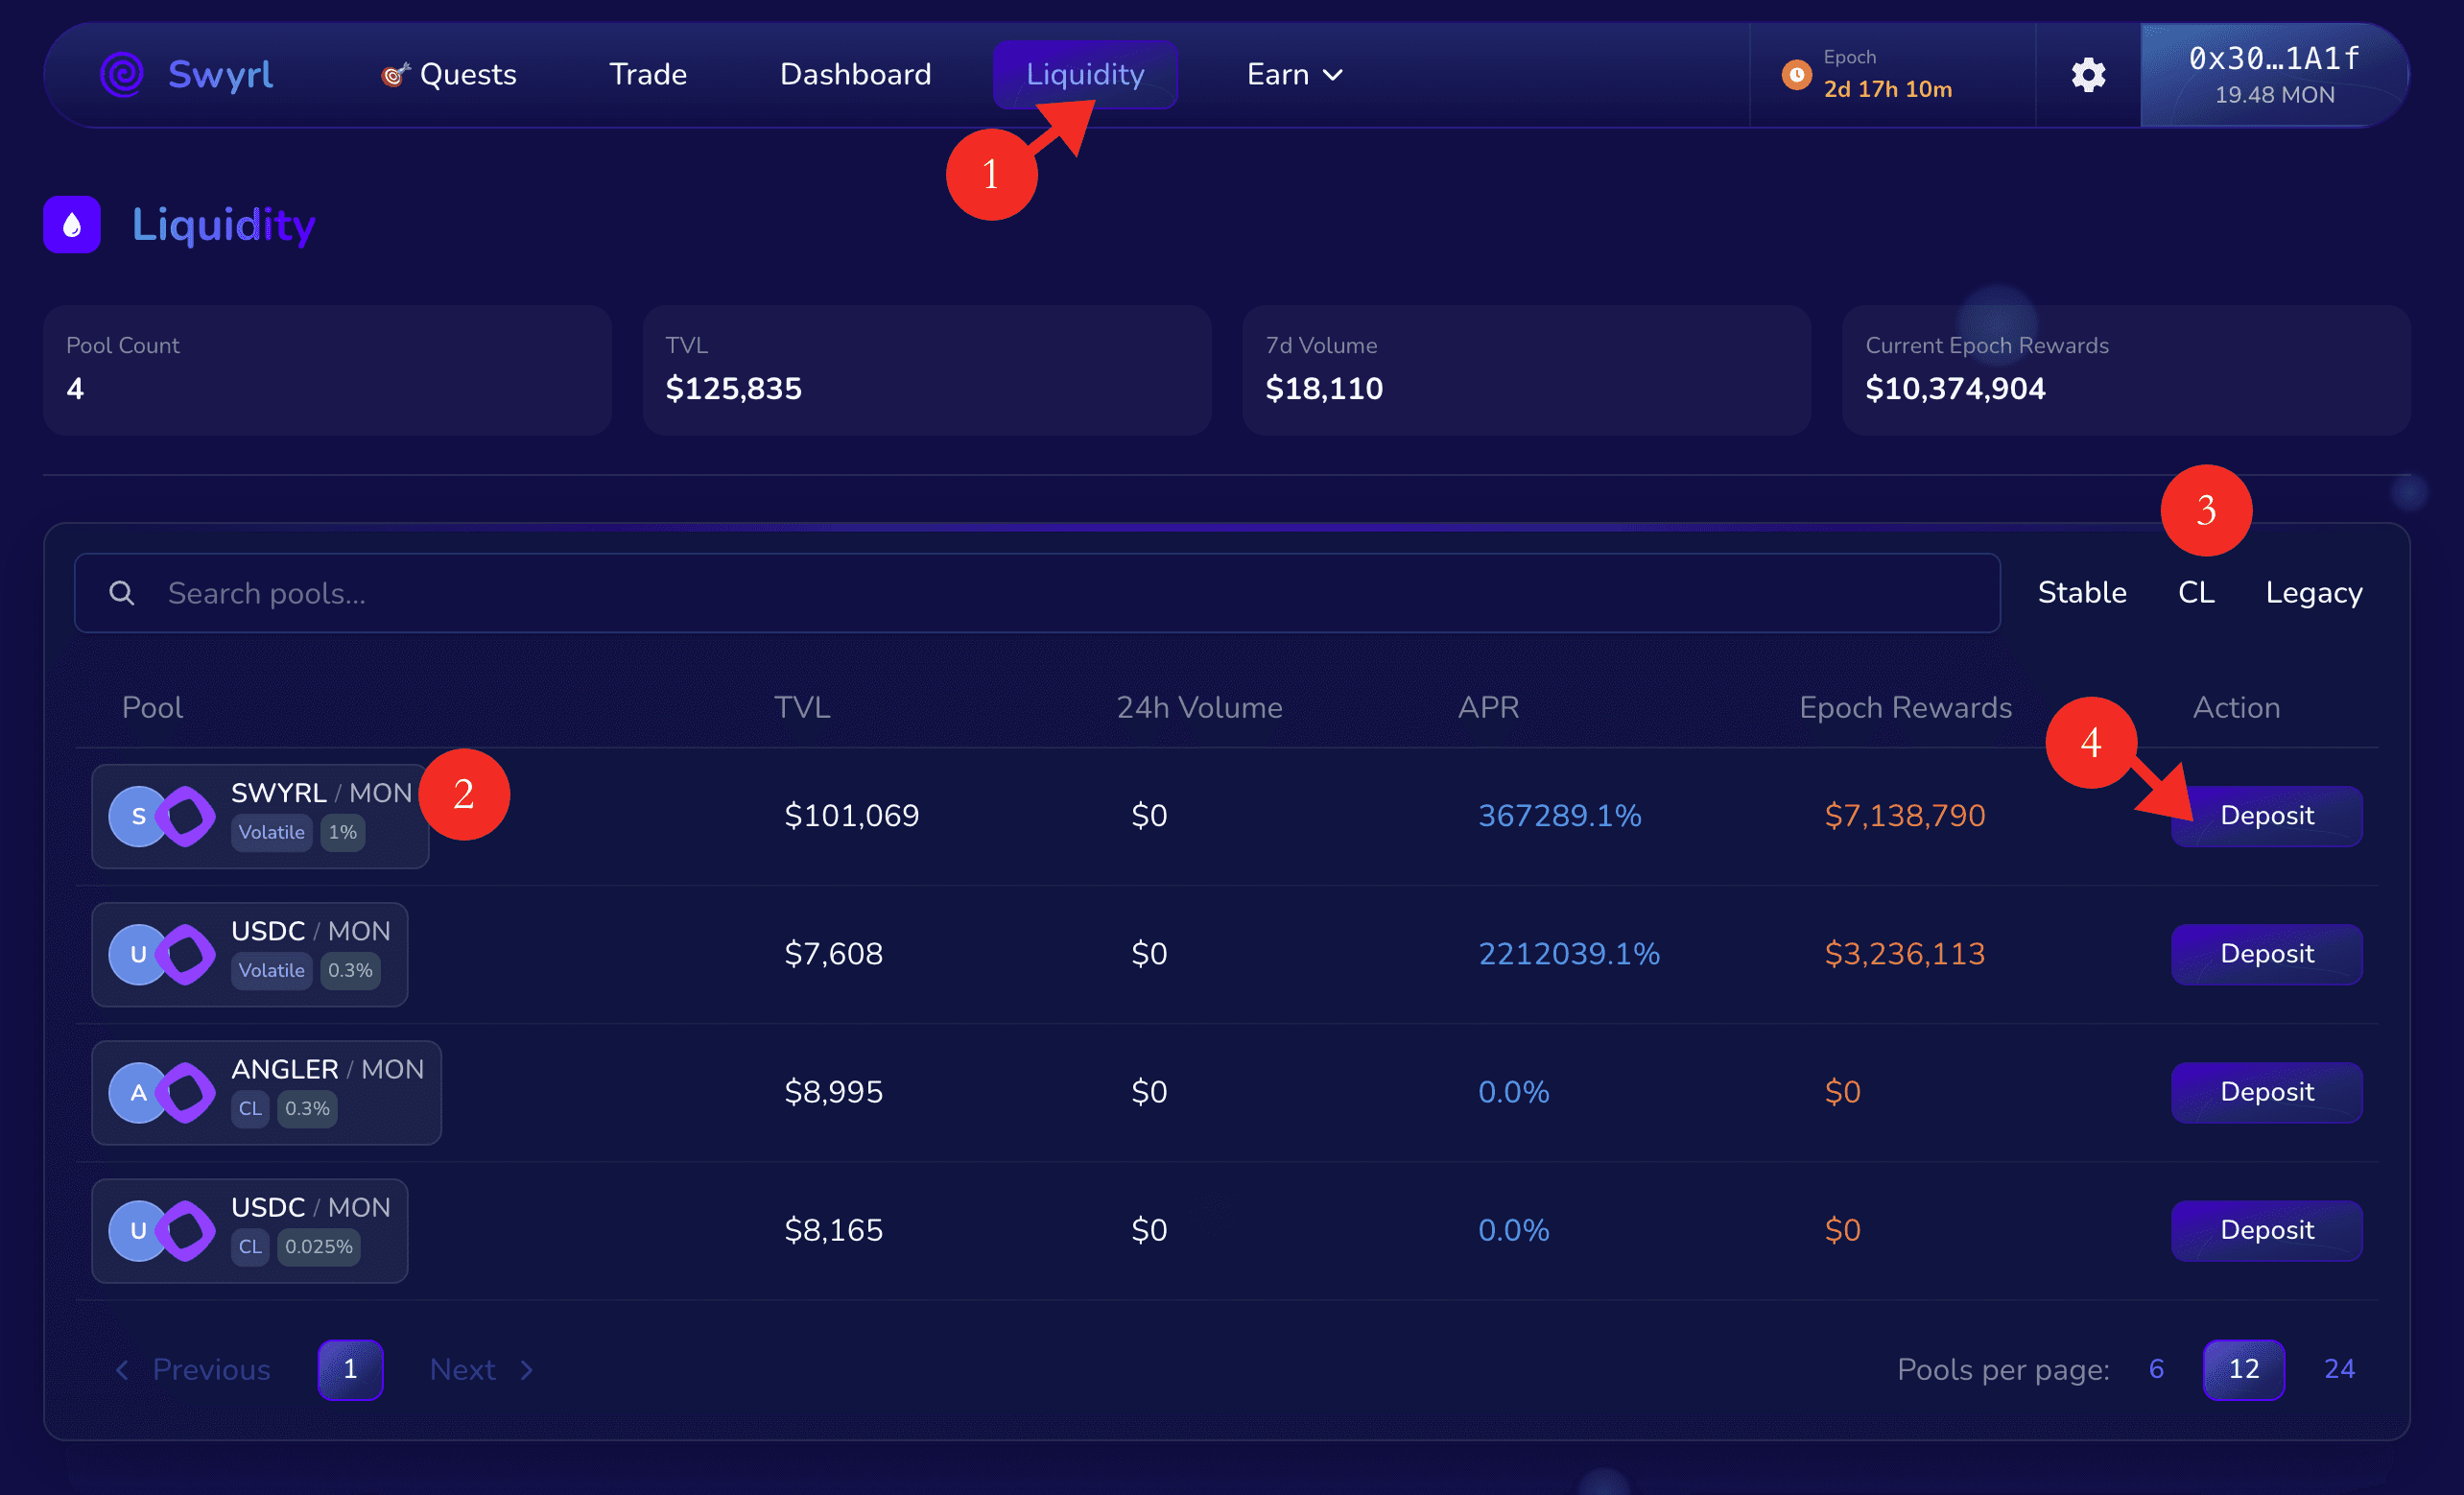
-
Navigate to Liquidity:
Click Liquidity on the top navigation bar to access all pools. -
Select a Pool:
Choose a pool (e.g.,SWYRL/MON,USDC/MON, orANGLER/MON) to provide liquidity. -
Filter Pool Type:
Use the tabs Stable, CL, or Legacy to switch between pool types. -
Deposit Liquidity:
Click Deposit next to your chosen pool to open the deposit interface.
Depositing Liquidity
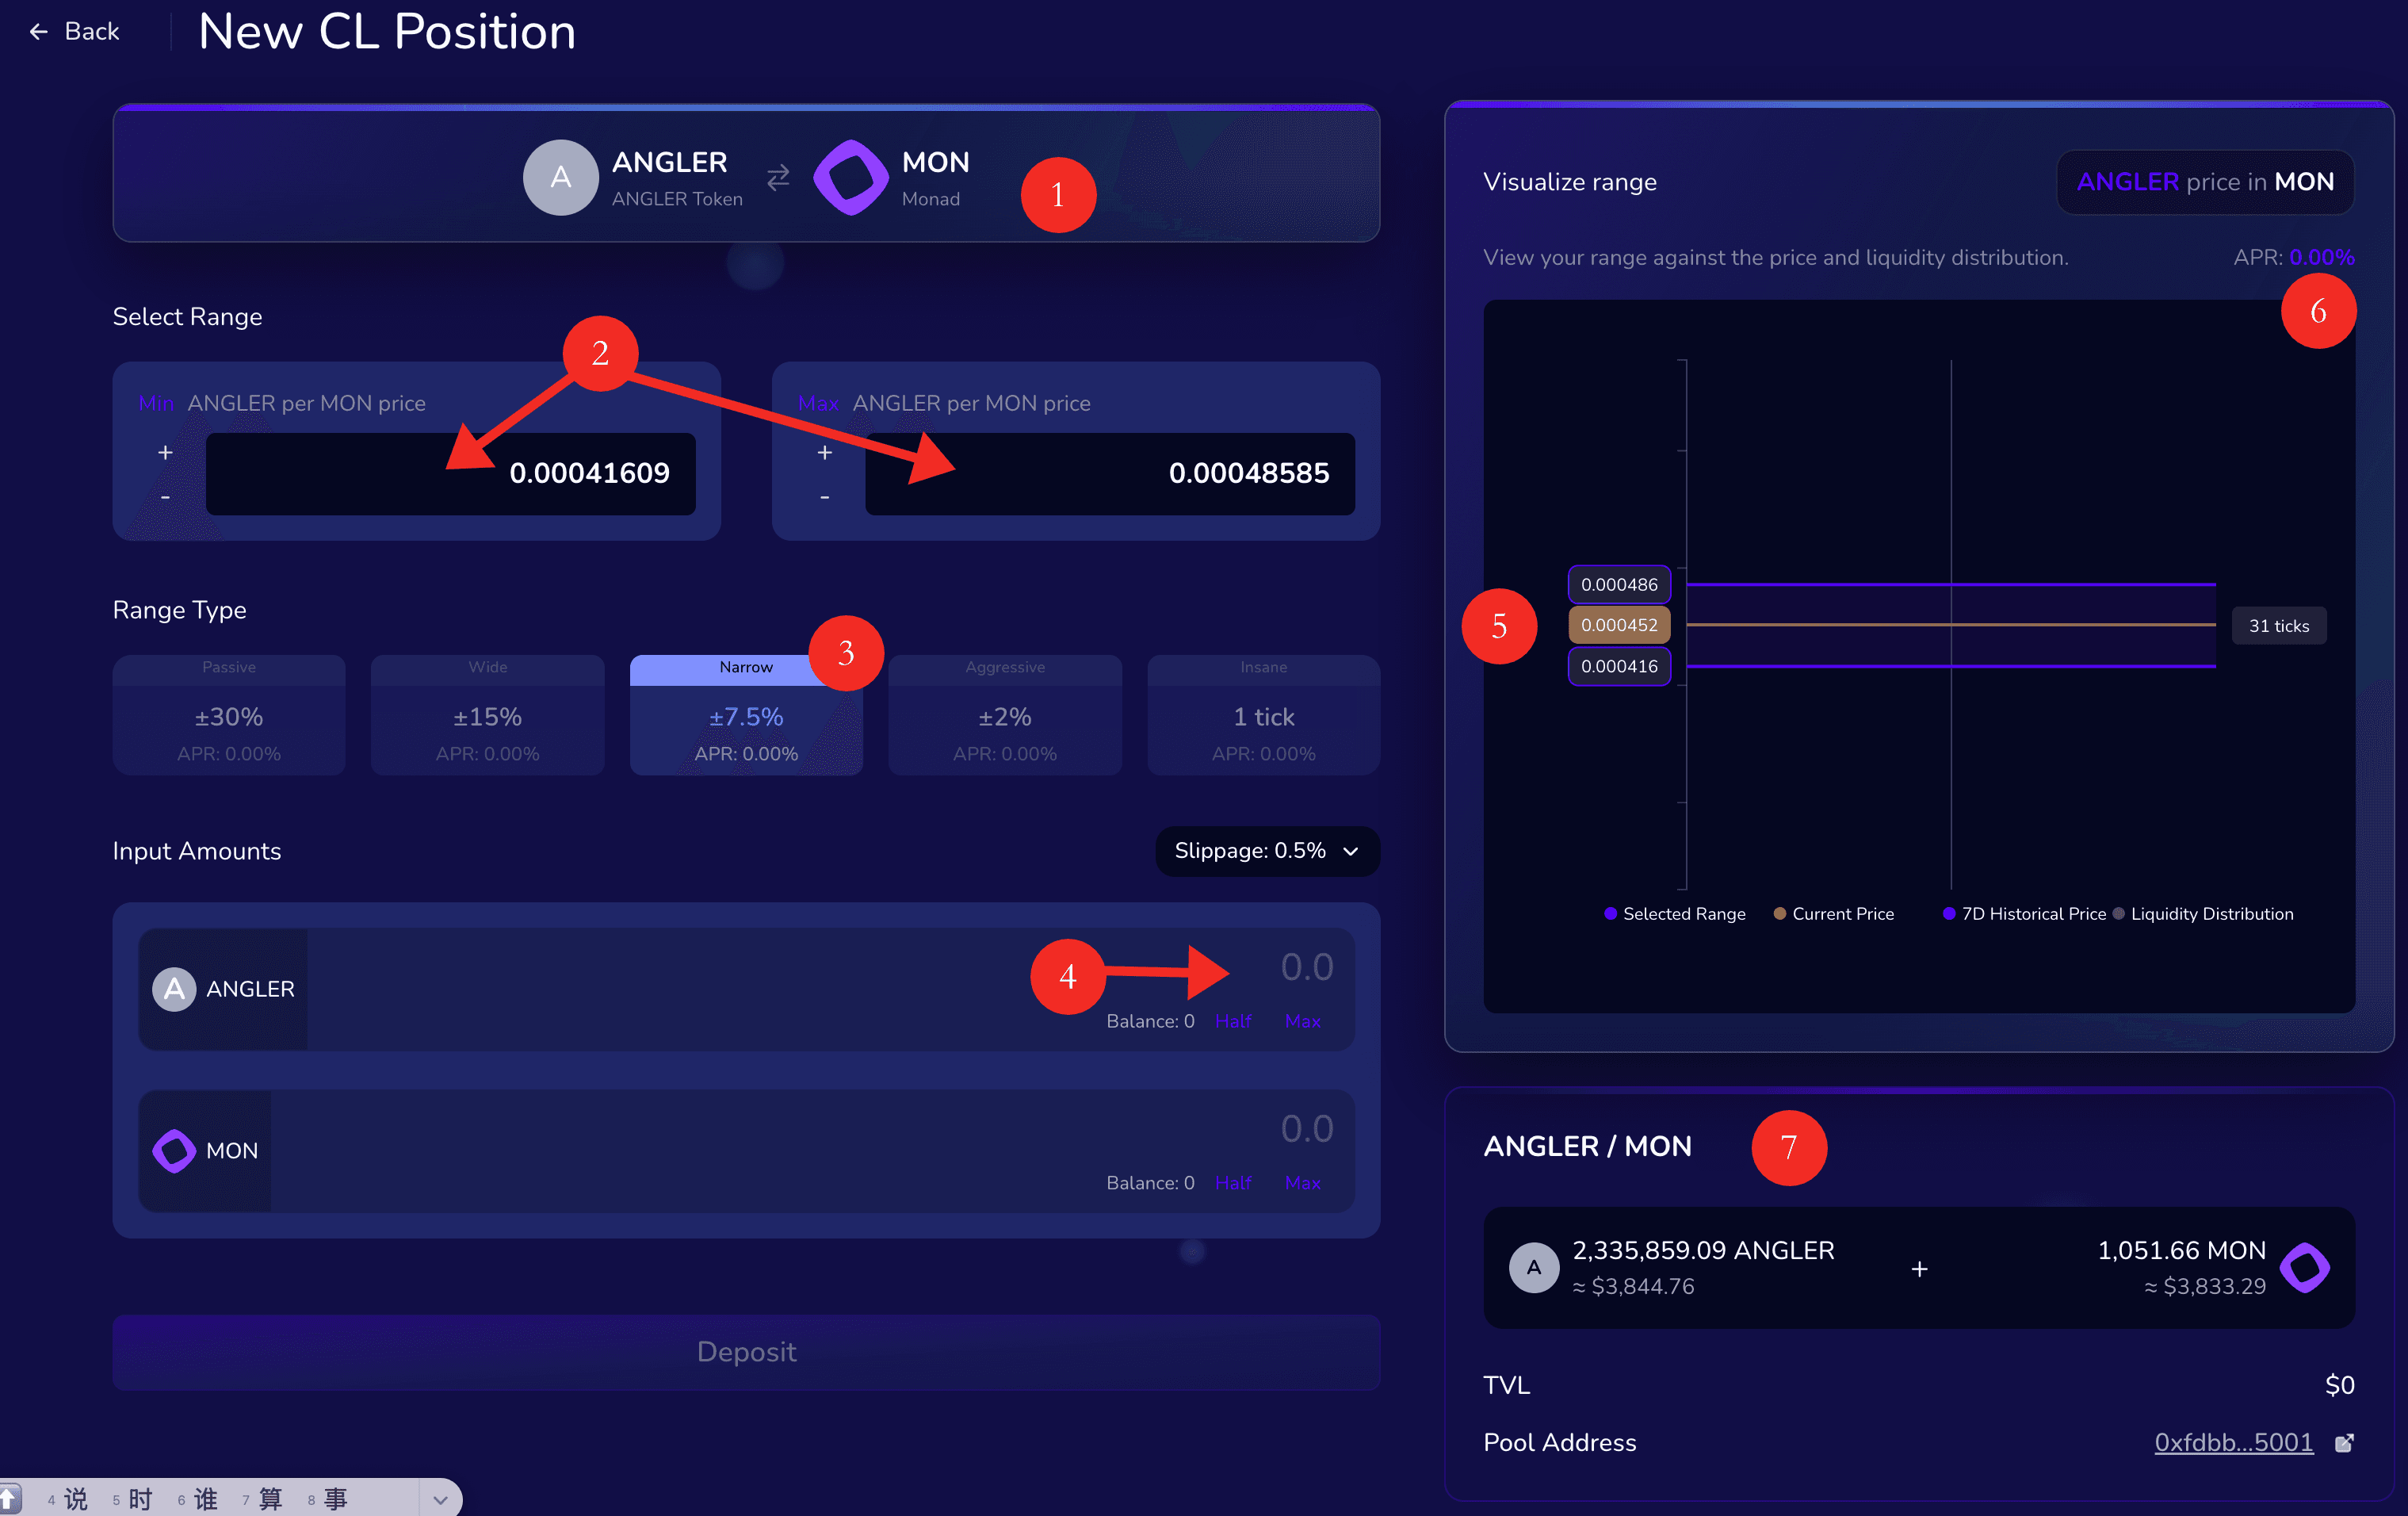
-
Select the Pool:
Choose the token pair you want to provide liquidity for (e.g.,ANGLER/MON). -
Set Price Range:
Define the Min and Max prices for your range — this determines where your liquidity will be active. -
Choose Range Type:
Select a preset range type: Passive, Wide, Narrow, Aggressive, or 1 Tick, depending on your strategy. -
Input Token Amounts:
Enter how much of each token to deposit. You can use Half or Max to auto-fill. -
Visualize the Range:
Use the chart to see your selected range against the current and historical price distribution. -
Check Metrics:
Review the APR, TVL, and token ratios before depositing. -
Confirm Deposit:
Click Deposit to create your position and confirm the transaction in your wallet.
Important: Please remember the risk of Impermanent Loss when providing Concentrated Liquidity.
Dashboard
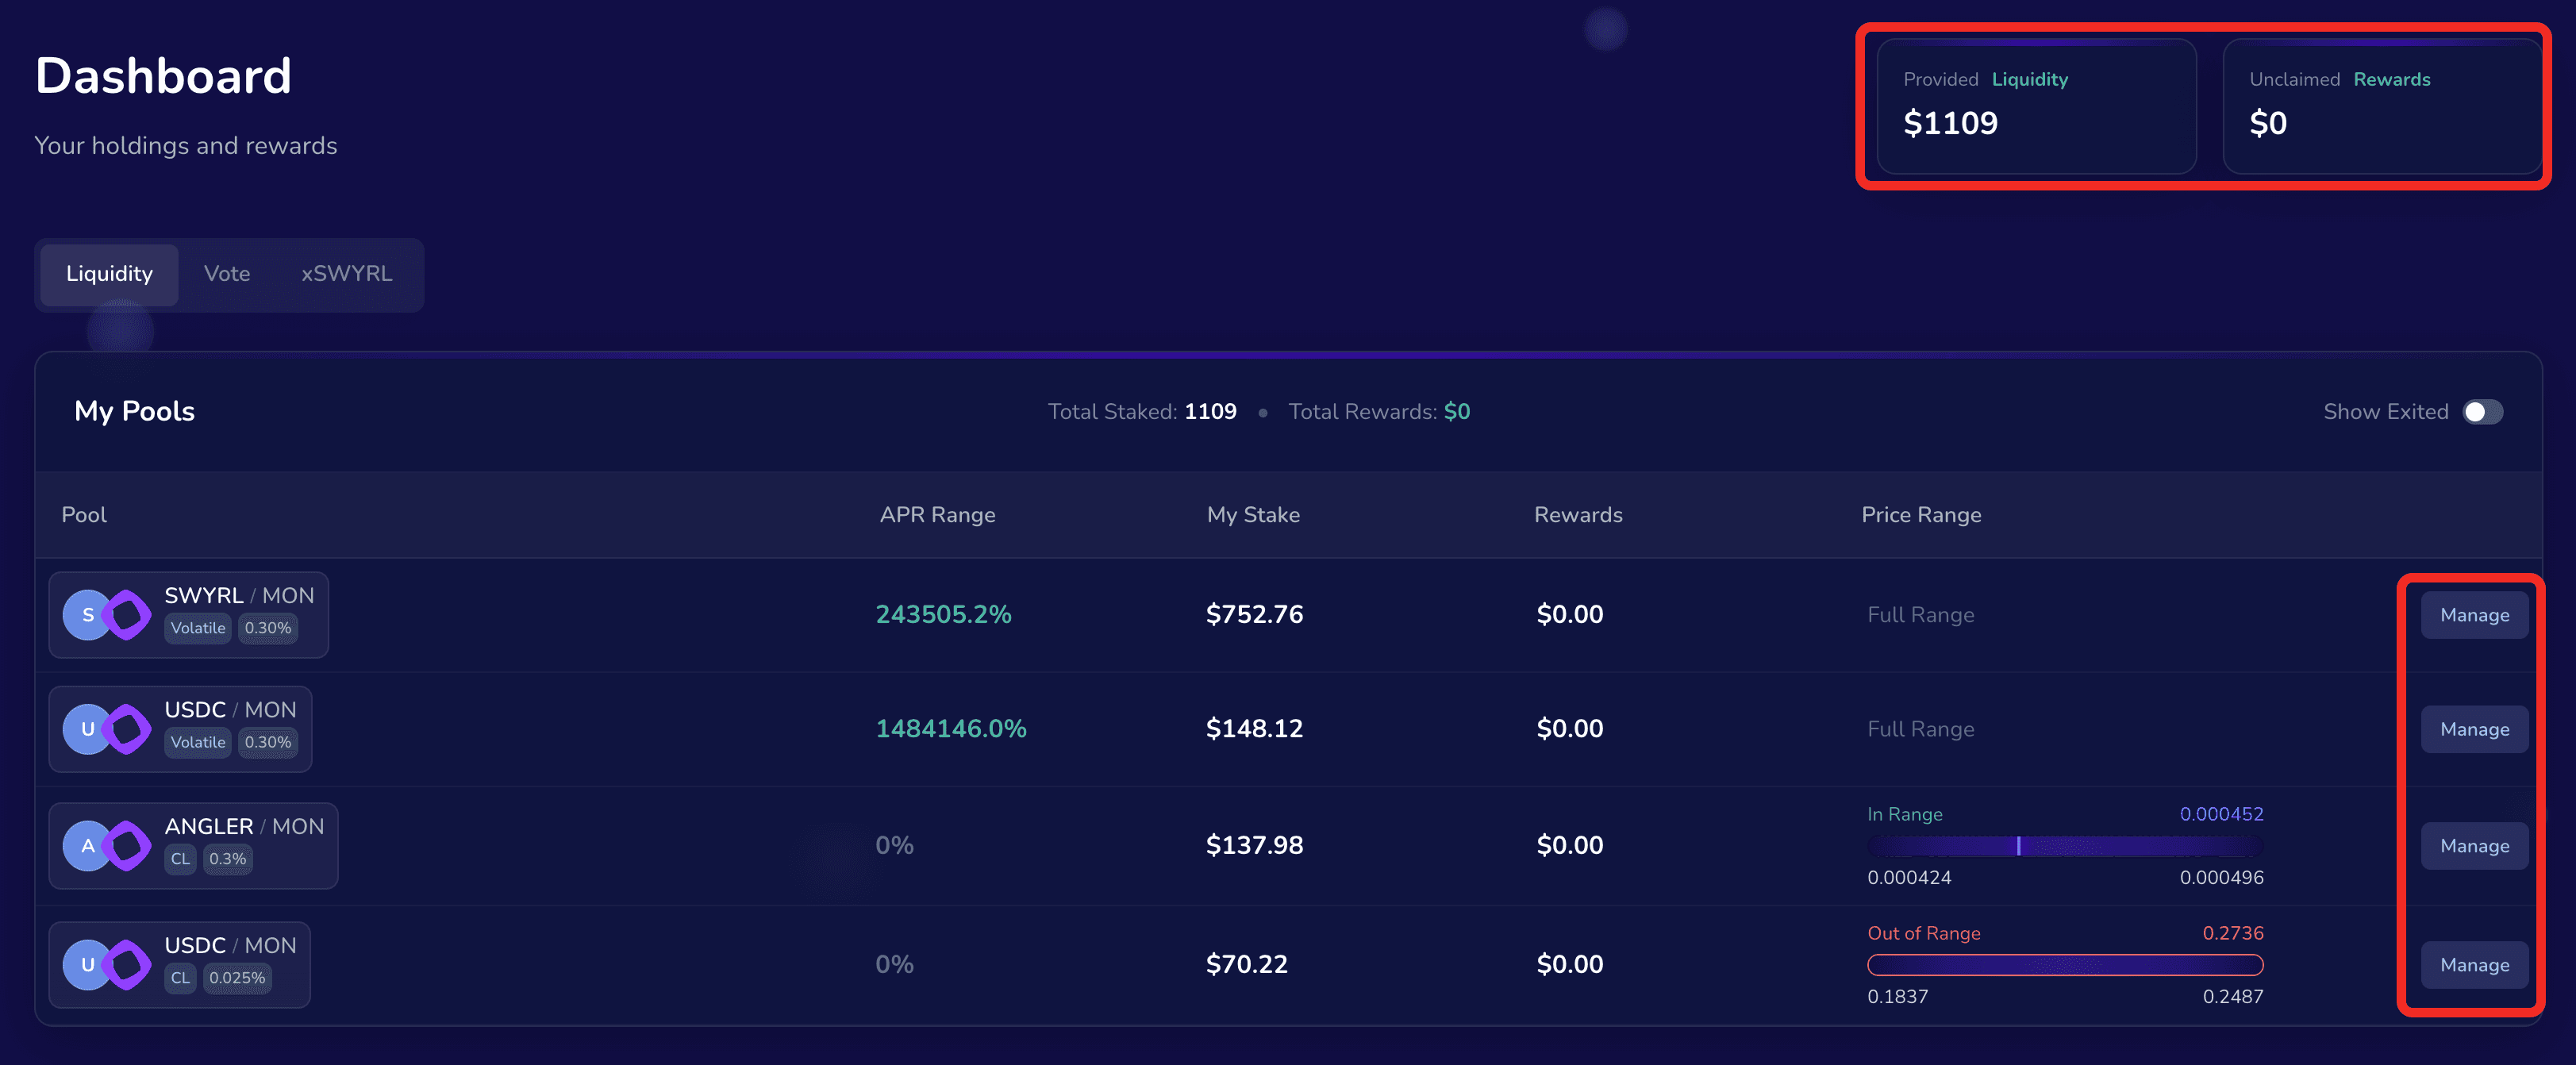
-
View Portfolio:
Go to the Dashboard to see all your active liquidity positions. -
Track Performance:
Check Provided Liquidity, Unclaimed Rewards, and each pool’s APR Range and Price Range. -
Manage or Exit:
Click Manage beside a pool to add liquidity, remove funds, or adjust your range.